Friday, 23 November 2012

Photogram

The photos below are what I produced in a photogram workshop.
A photogram is a process of creating photos without a camera. This is done by placing objects between light sensitive paper and a light source.
The objects I used were my resin and wax pieces I made for hanging on my mobile.
The first photo I created I exposed to the photo sensitive paper to light for 5 sec at an aperture of f 2.0.  Next step I immersed it into the developer. It was developing very fast so I know that I had exposed it for too long, or with too low an aperture, so I moved it in to the stop liquid etc… for the next photo fig.2 I decreased the light exposure from 5 to 4 sec with an aperture to f 2.8.
Both photos below are photos of these photos and fig.1 is lighter than the original.

fig.1                                                                  fig.2
I really enjoyed learning and watching the photographic processes in this workshop. For me its in the unknown of what each piece of photo sensitive paper will unveil.

Thursday, 22 November 2012

Making a mould

Pieces i made of clay to make a mold for the creation of fibreglass and wax pieces I'm going to hang from my mobile.

Plastic mold filled with wool and wax. I used wool in the wax for the over all finished piece being aesthetically pleasing

Plastic mold, filled with cut up coloured plastic acetate (that i spoke about in a previous post), in a resin poxy. The acetate pieces are cut up pieces of a photo which i tried to print out onto acetate. This did not work to plan and the acetate got chewed up by the printer. Even thou the acetate print did not work out the way i wanted it to, it was the folds and curves created by the melting of the plastic that made the acetate an even better piece to work with than if the acetate had printed out perfectly flat.

Print


What you see here is a laminating pocket that I have filled with wood chips I collected from my woodcut.  I sealed the pockets by putting them in a paper bag and ironing on low, and am delighted it worked.

Inside this laminating pocket I have inserted curled up wire 

And in this one i placed wool. 
In all three laminated pockets i positioned the materials in the shape of movement.
In my exploration of print i inked straight onto the surface of the first two of these laminated pieces and printed them which you will see below.  

A4 print of laminated wire. Positives: I like the continuality of line created by the wire, the contrast between wire and space around it, the wrinkles that have shown up in the plastic and the colour purple. Negatives: the plastic was lifting as i was rolling on the ink and it had to be held down with my fingers, which leaves fingerprints on the plastic and ink on my hands which end up with fingerprints on the paper, the plastic doesn't hold the ink smoothly and the print comes out with an uneven colour which leaves the print with an unprofessional finish
A4 print of laminated wood chip done in the yellow ink, and on top of that i printed in orange the opposite side of the lamination sheet.  Great to explore but I don't like finished piece as the inks are uneven and its uneasy on the eye in its confused layout.

A4 print of laminated wood chip done in the orange ink, and on top of that i printed  the laminated wire which i done in purple. Don't like the finished look. The orange and purple clash and have an uneven finish.


woodcut i made when i was exploring my natural space


 Although i didn't active an even inking i do really like the line of the image and the illusion of a 3d effect that i think i achieved by looking past the tree and into the forest.

Again the ink on my print is uneven, although i do like the use of the two colours as i feel it creates atmosphere.  It's not the usual way to add colour as i added it on to the same woodcut rather than than making up another one with opposite cuts

woodcut i made based on the displacement of space.

  Not a great photo buts its a print of the woodcut above based on the circular movement of the displacement of place. I don't think it works as a single colour piece but i think it might work with a another couple of woodcut with opposite cuts so to bring in more colour and enhance the essence of movement in the image 

Wednesday, 21 November 2012

Meltdown


‘An Object Moves a Space must Change’
The reason for me creating a mobile is to show that when an object moves a space must change in the Displacement of the air in that space.  
For that to happen I need my mobile to be equally suspended on all sides as well as having weightiness. I am adding weight so that with the pull of gravity and the air currents moving around the mobile will rotate rather than just fall to one side, which is what would happen if it was too light.  
To accomplish this I am making attachment pieces for my mobile with some weight in them. I have chosen fibreglass for its weight. 
I want to use colour in these pieces to capture light, so I have taken a picture of the wool I used in my last experimental pieces for its variety of colour. I tried to print this photo onto acetate, so that I would have a transparent image to insert into fibreglass resin. It did not work though, as the printer melted and chewed up the acetate on numerous tries. So instead of having a complete image I ended up with strips of parts of my image.   Even thou it was not what i was looking for, the melting and chewing up of the acetate by the printer created beautiful shapes in its folds and curves. And rather than throwing the acetate out, it would work perfectly by being far more astectically pleasing than if it had worked out. So I used the chewed up pieces instead. 
Below in the photo, what you can see, which I thought was interesting, is my image of my wool instillation on the inside of the printer after I had pulled out the chewed up piece of acetate.  It’s not quite the image I was looking for but it’s really fascinating to see what happens in the printer before its printer and even more so seeing my image captured on the printer rollers. i think it's pretty cool

Exploring how to build a structure to make a movable moble


These are not the best photos, as the leaf stands out more than the wire, but i did not yet want to take down the leaf as it was at the time still a work in progress.
Below and in front of the leaf, I've used string rather than a chain or metal bar in the making of this mobile, so to create flexibility and free movement. The string i have chosen to use is transparent to create the illusion of movement suspended in air.  Rather than attracting the thread straight to the horizontal bar i have found in my experiments that a hooked on vertical metal bar centres the string as well as helps it moves.


The video below shows, with balance, how the metal rods will move. I shortened the vertical metal hook to investigate if it would help in the mobiles movement. And to be honest I don’t know if it does, but it does help with giving me more room to build in so that i wouldn't be banging my head.


http://www.youtube.com/watch?v=_TVa38n3pdc&feature=plcp

Monday, 19 November 2012

Exploring graphics

Exploring the use of graphics, to alter and transform an image i took from the wool i used for my displacement of space project.  I distorted this image, which you can see in fig 1 below, by a variety of image processes, such as, the modification of colour, temperature, contrast, film grain, focal point, inversion etc...
fig. 1


Sunday, 18 November 2012

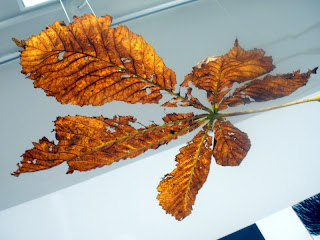
Space & Time: Leaf


20-9-12

25-10-12

15-11-12

Spring


Taking it off the ground by Using wire in the creation of a new hanging space


Certainly liked this design, as it is aesthetically pleasing as well as creating extra space and  giving me a 3d frame for which to work with. What it didn't do was move which is where i am heading to next with this project.


Turn it on it's Head

Wasn't yet finished exploring the use of wool with my expression of the displacement of space. So i took it down by removed most of the wooden structure  leaving just the roof  with wool attached.
 Building it from the ground up, i used a wooden stick and wire to connect the wire to the frame. I twisted, stretched and loosened the wool before affixing it to the wire. What i wanted to achieve with this piece was in the making. Its was in the squeezing and twisting and turning and pulling and stretching of the wool, its in the motion as i explore and when i feel the piece is finished, i captured a freeze frame of that expression of the movement of the air as it is displaced. 
So for me to move forward with this project i am going to take it off the ground, and build Mobiles.